


1
Today, we’re going to show you a simple way to achieve a gradient-heavy illustration of a little monster.
It’s got a 3-D feel, but it’s done using only gradients. So, stick with us; we’re going to use and see some really nice easy tips for creating this little monster. The tutorial is intended for beginners.
We’ve included the Illustrator file at the bottom of this post, so you can download it to learn more from it.
If you followed this tutorial to create your own little monster, please share your results and experience with us in the comments.
Step 1
First of all, open Illustrator and make a 40 × 40 cm canvas. Now, using the Rectangle tool (the shortcut is M), create a square that fits over the canvas.

Using the Gradient tool (G), create the following radial brown gradient. You can set it exactly by opening the Gradient panel and using the colors below. Copy the RGB values to get them exact.


Place the gradient at the top of the square using the Gradient tool (G), just like the picture below. Then, create another rectangle at the bottom of the canvas using the Rectangle tool (M). Copy the same gradient using the Eyedropper tool (I), then place it at the bottom again using the Gradient tool (G).


Step 2
Using the Ellipse tool (L), draw this oval. Rotate it using the Selection tool (V), and then adjust it a bit using the pencil tool (N).


Let’s add a nice gradient to it. Go to the Gradient panel, and set the colors to what is shown below.


Adjust the range of the gradient using the Gradient tool (G). Now create another circle using the Ellipse tool (L); it will be one of the eyes.
Open the Gradient panel, and create this radial orange gradient. Use the screenshots below to match the colors.


Duplicate it using the Selection tool (V), and drop the layer to the back.
Repeat the process of making the oval, and then just copy the gradient using the Eyedropper tool (I).
Using the Ellipse tool (L), create this ellipse that looks like a fly wing; you can adjust it using the Pencil tool (N). Open the Gradient panel and create this radial gray gradient, using the screenshots below to match the colors.


Select the wing, and then open the Transparency panel and choose the blending mode called “Multiply.”


Now, duplicate the wing using the Selection tool (V) + Alt, and distribute it along the body.
Step 3
Now let’s create a mohawk. Using the Pen tool (P), draw this spiky shape and place it behind the first eye.

Using the Gradient tool (G), create this purple-pink radial gradient, open the Gradient panel, and set the color as seen below.


Again using the Pen tool (P), create triangles along the hair. And using the Eyedropper tool (I), copy the same gradient, being careful with its range.


Step 4
Let’s work on the other parts of the body now. Using the Pen tool (P), draw the shape below, which will be the neck of the creature. Add some gradient using the Gradient tool (G), and then open the Gradient panel to set the color as seen below.


Repeat the same procedure of drawing the shape with the Pen tool, but this time use the Pencil tool (N), which will make drawing the fingers a little easier. Then just copy the same gradient for the neck, body and head using the Eyedropper tool (I).


Duplicate the arm using the Selection tool (V) + Alt, and then reflect and resize it on the other side.

Repeat the process for the legs. Don’t forget: our little monster has three legs!


Step 5
Draw the rounded shape below using the Pen tool (P). Then add an orange radial gradient using the Gradient tool (G). Set the colors according to the screenshots below.


Doing the rest of the chest is really about drawing a round shape using the Pen tool (P), duplicating it with the Selection tool (V) + Alt, and then adjusting them with the Direct Selection tool (A). This will take some time.
Step 6
Using the Ellipse tool (L), draw a circle on the first eyeball. Then, using the Eyedropper tool (I), copy the radial gradient from the hair, and place it as seen below.

Copy the circle using the Selection tool (V) + Alt, and select a radial gradient, going from white to transparent, to lay over top.


Using the Ellipse tool (L), draw a little circle, and add a black radial gradient to it.


Using the Ellipse tool (L), draw a little white circle, and place it as seen below. Now, repeat the same process, but smaller this time.


Copy this pupil, and resize it on the other side.

Step 7
Shading the monster isn’t so easy. If you are a beginner, you’ll need some skill with the Pen tool (P). Basically, you have to draw the shape, add a gray gradient and then set the blending mode to “Multiply.”


For the feet, we’re going to use a smoother shadow. First, draw circles using the Ellipse tool (L), and then go to Effect → Blur → Gaussian Blur, and set the radius to 25 pixels.

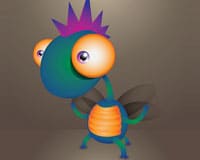
The result

Marcos Torres is a Brazilian illustrator and art director who works for a marketing agency and for Abduzeedo as a tutorial designer. You can see more of his work on his website and get in touch with him on Twitter.
If you followed this tutorial to create your own little monster, please share your results and experience with us!

Exciting New Tools for Designers, March 2025
Spring into action this season with new tools to boost your workflows, facilitate creative thinking, and help you be a more efficient designer. This roundup is packed with new goodies…

Compilation: 15 Hilarious Google Flops
When it comes to tech, Google has been synonymous with innovation, success, and world domination (hello, Android and Chrome!). But even the mightiest giants trip over their own feet from…

3 Essential Design Trends, January 2025
Happy New Year! If the website design trends we are already seeing are any indication, 2025 is going to be a great year for visual communication. This month’s collection of…

Exciting New Tools For Designers, January 2025
Welcome to our first tools round up of 2025. It’s the first Monday of a new year, and many of you are back at work after a much needed break….

40 Best New Websites, 2024
As regular readers will know, each month we roundup the best new designs of the previous 4 weeks. And now, at the end of the year, we’ve selected our 40…

The 30 Best Fonts of 2024
2024 has been a great year for type design. Over the past few years geometric sans have been less apparent, with cursive and serifs having something of a renaissance; that…