 If you build new WordPress websites on a regular basis, you may be familiar with the process of setting up a local WordPress installation using WAMP or XAMPP to do your development work before migrating the site to your live server. It’s a great way to speed up the development process, as you don’t have to keep uploading your changes before you can view them, and besides, it’s not good practice to make changes to a live website.
The biggest drawback of using a local WordPress development server, is the long-winded process of migrating a site from one server to another.
The process involves backing up all your WordPress files, exporting your database, creating a new database on your live server, uploading your WordPress files to the live server via FTP, importing your data into the new database, editing all references to the local server in the new database, and configuring settings/widgets etc. Full instructions can be found in the WordPress Codex.
Wouldn’t it be great if there was a way to do most of this automatically, so you could migrate a whole site in just a few minutes?
Fortunately, there is. It’s called BackupBuddy.
More than just backups
BackupBuddy is a premium WordPress plugin that makes it really easy to keep all of your WordPress sites securely backed up, so that you can restore them easily should anything ever go wrong. You can schedule regular automated backups of your files and database, and you can have your backups sent to offline storage like Dropbox or Amazon S3.
BackupBuddy costs from $75 (for 2 licences) to $150 (for unlimited licences), so if you manage websites for clients, it’s great value for the backup functionality alone.
But what makes it truly great is the ability to migrate an entire site to a new server with just a few clicks.
With the latest version of BackupBuddy, it’s been made easier than ever before, with their Magic Migration feature, which allows you to do the entire migration from your WordPress dashboard.
Note: The one thing you do still have to do manually is create a new MySQL database on your live server, but this is usually a very simple process if you use the database wizard in cPanel. Once you’ve created your database, make a note of the server, database name, username and password, as you’ll need them later on.
Getting started
The first thing you need to do is purchase BackupBuddy and follow the instructions to install it on your local WordPress installation. Once it’s installed, you will see a new BackupBuddy navigation menu in your WordPress dashboard.
Then you need to navigate to BackupBuddy > Settings and enter an ImportBuddy password. You will be asked for this later, when you migrate your site, as a security measure. Enter a password and click Save.

Create a backup
Once you have your local site finished and ready to be migrated, the next thing you need to do is create a full website backup.
Go to BackupBuddy > Backup and click on Complete Backup. This creates a backup of both your database (site content) and WordPress files (themes, plugins etc.)
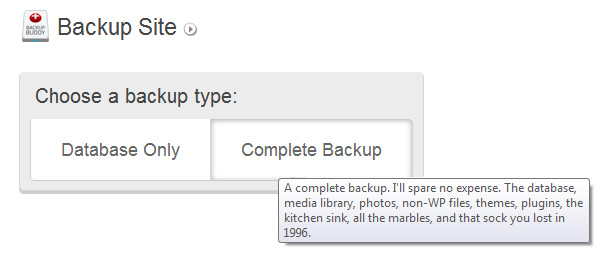
BackupBuddy will then get to work backing up your site, which may take a while, depending on the size of your website. Once it’s finished, you can download the backup ZIP archive to your computer for safekeeping.
Note: If you go back to the backups screen, you can also click Send file offsite to send a copy of your backup to an offsite storage space such as Dropbox or Amazon S3. I recommend that you do that for added peace of mind, but I won’t go into the process here.
Migrate your backup
Now go to BackupBuddy > Migrate, Restore and scroll down to the Automated Migration panel. You’ll see the backup file you just created. Hover over it and click Migrate this backup.
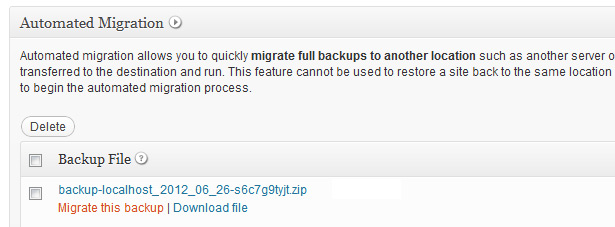
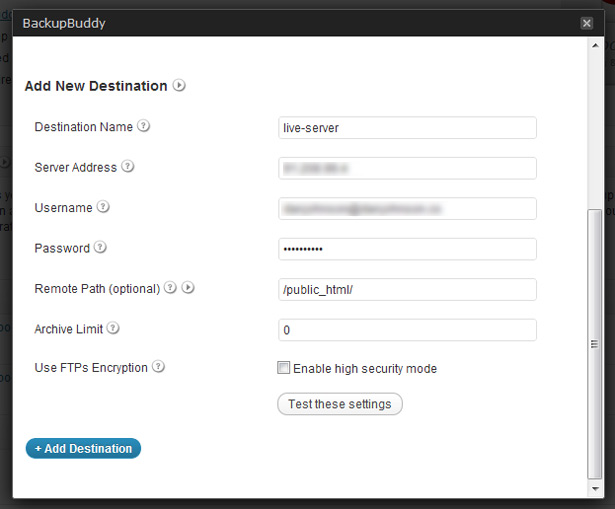
Next you need to add a new destination, by entering the FTP details of your live server. Enter your details and click Add Destination.
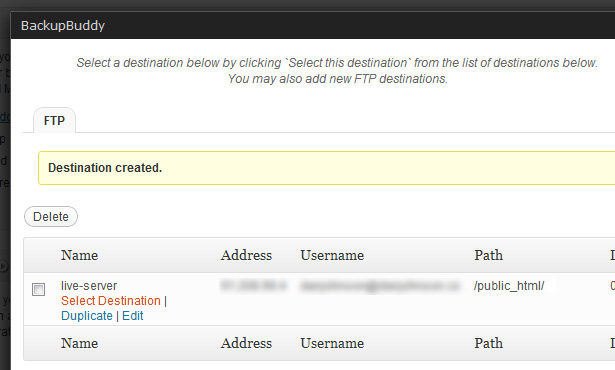
Then hover over the destination you just created, and click Select Destination.
Next you need to enter the URL where your new website will live, which will probably look something like http://yoursite.com (unless you specified a subdirectory in your destination).

When you click Begin Migration, you will then be taken through a six step process:
- Choosing your backup file (it should default to the one you made earlier)
- Unzipping the backup file (automatic)
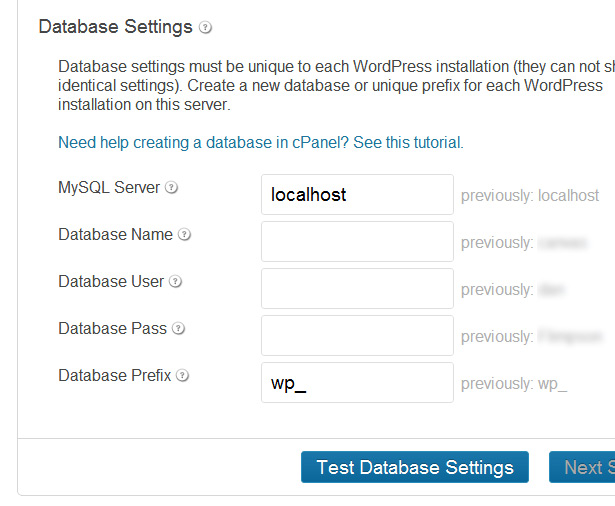
- URL & Database settings.
Here you just need to confirm that the URL of your new site is set correctly, and then enter the details of the database on your live server. The first four options will be provided by your web host. For the Database Prefix, it’s a good idea to change the default wp_ prefix to a random string of characters, as it will make your database more secure. - Database Import (automatic)
- Database Migration (automatic)
At this stage the migration is complete and you can navigate to your new site and check everything is working properly. If so, make sure all the boxes are checked under File Cleanup and click Clean Up & Remove Temporary Files. - Final Cleanup (automatic)
Done! That’s really all there is to it. Your website should now be up and running on your live server, exactly as it was on your local server, with all the plugins and settings already configured.
You can use this same process to move an existing site between two live servers too, in case you need to switch hosting providers or a client decides to manage their own hosting.
I’m sure you’ll agree that if you do a lot of local WordPress development, the time you save by using BackupBuddy and Magic Migration will really pay off in the long run.
Have you tried BackupBuddy? Do you use the Magic Migration feature, or do you prefer to do these things manually? Let us know your thoughts in the comments below.


