 Photoshop's Curves is a flexible control that can brighten or darken parts of a layer based on the layer's luminosity.
Editing tones in an image—not just grays and not always photos—can do more than fix highlights and shadows.
Curves can be used to edit photos, masks, graphics and even hues. But using it requires a little know-how and imagination.
Read on for more details about what Photoshop curves are, as well as how to use them properly for your designs.
As usual, feel free to leave us your comments at the end of this post.
Making Tonal Adjustments
Curves is found near the top of the Image → Adjustments menu. Its most obvious use is to adjust contrast in an image, and it is intuitive enough that most users need to study it only for a minute or so before catching on.
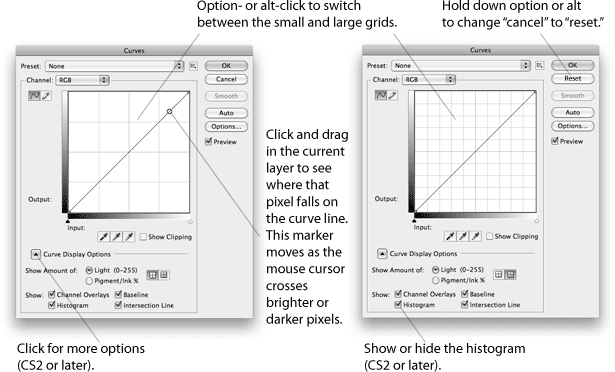
Above: Drag a point on the curve line up to make the image brighter and down to make it darker. But what does that mean?
Curves uses a grid that shows before and after. The horizontal axis indicates original tones, and the vertical axis indicates how they will change. A diagonal line bisects the grid. Dragging points away from the diagonal line will brighten or darken highlights and shadows depending on where the change happens.
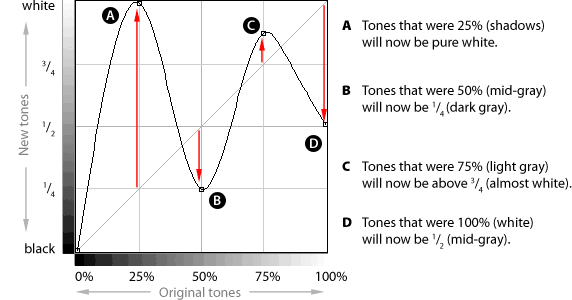
Above, the curve turns shadows into bright highlights, muddies mid-tones and turns the original white point into middle gray. The further the curve moves away from the diagonal line, the more extreme the change will be. It also means that the angle of the curve changes the image’s contrast in a given range of tones.
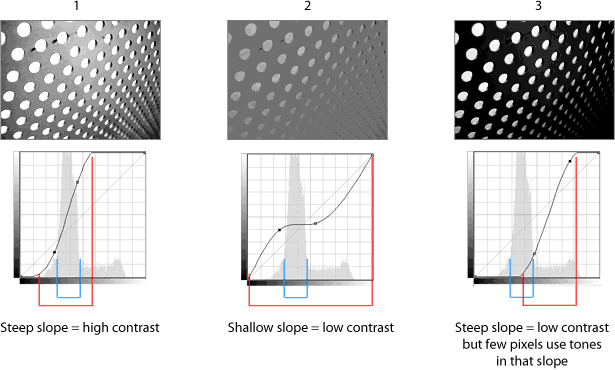
Above, blue denotes which tones most of the pixels use. Red denotes the slope.
- Most of the tones are just to the left of mid-gray, so creating a steep angle in that area would give most of the image more contrast.
- The opposite—giving the mid-tones a flat slope—lowers the contrast.
- Creating a steep slope away from the popular tones creates extreme contrast: many shadows, some highlights and few mid-tones.
Choose Tones to Change With Curves
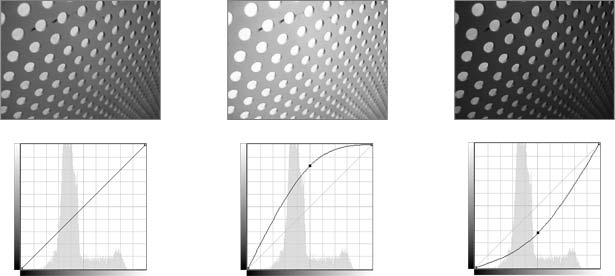
Unlike Levels, Curves allows changes to a select range of tones. Not only can shadows, mid-tones and highlights be changed, they can be changed independently.
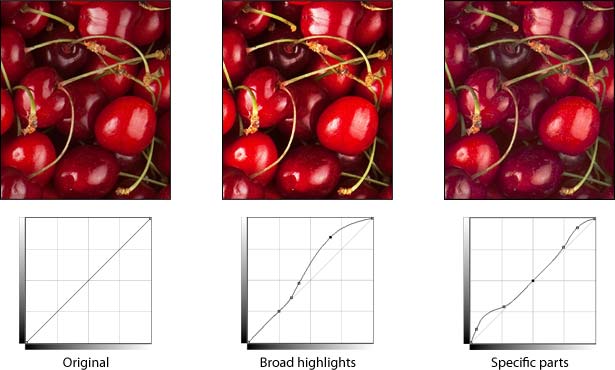
Two variations on the photo above show how Curves can affect different areas. In the center photo, pixels brighter than 50% are all brightened. But only the highest highlights—and darkest shadows—are brightened in the right-most image.
To add a point to the Curves line, simply click the line. To remove a point, drag it off the grid.
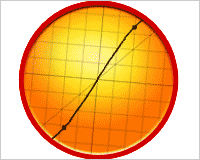
The Curves control isn’t limited to photos. For example, the logo below has a subtle texture—but what if “subtle” isn’t the right look?
![]()
Above, a change in Curves brings out the texture in the disc and amplifies the sheen on the bolt. Knowing that Curves can be used beyond fixing tones and can be used in photos is the first step to grasping its hidden features.
Playing With Color
The Curves control hides many features in plain sight. One of these is the ability to color-correct (or cross-process) any digital image.
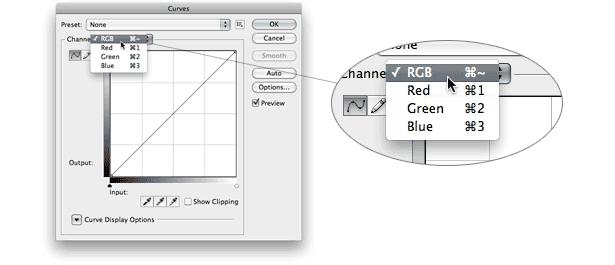
Above: with a drop-down menu above the grid, the user can edit one channel (red, green or blue in RGB images) at a time.
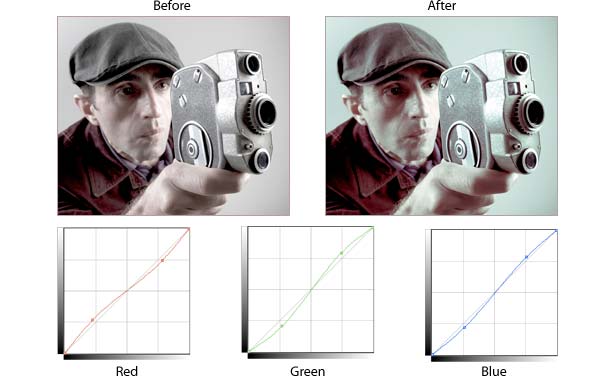
The photo above was given a color cast by warming its shadows and cooling its highlights. Specifically, red is removed from the shadows but added to the highlights, and vice versa for blue and green.
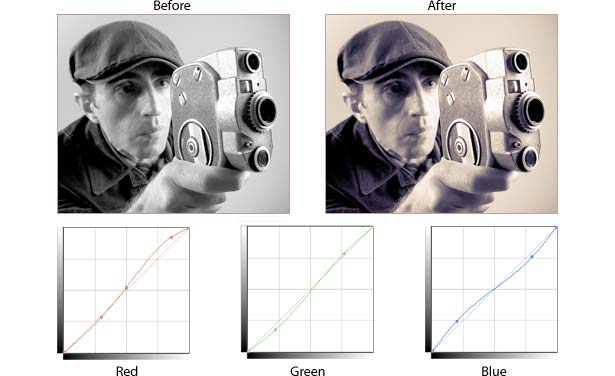
A grayscale version of the same photo becomes a duotone when we use Curves to adjusts its channels. Above, extra red and green warm the highlights and mid-tones, while the shadows take on a bluish tinge. In Curves, channels often don’t require major changes to alter an image dramatically.
Improving Selections
Selections and masks in Photoshop aren’t simply on-or-off features, but rather a range of values—much like a gradient. And masks, like gradients, can be manipulated with Curves.
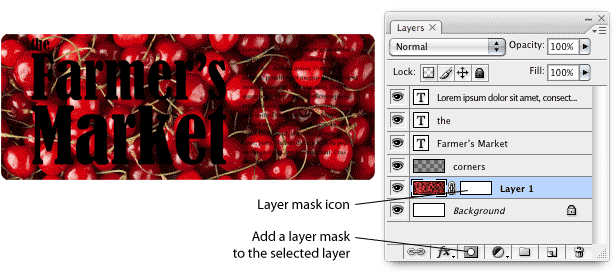
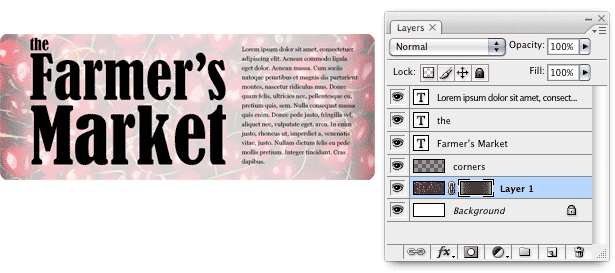
We want to screen the red image behind the black text but leave details at the edges. We start by adding a mask to the photo with the layer (above). A layer mask controls the layer’s opacity without erasing its pixels.
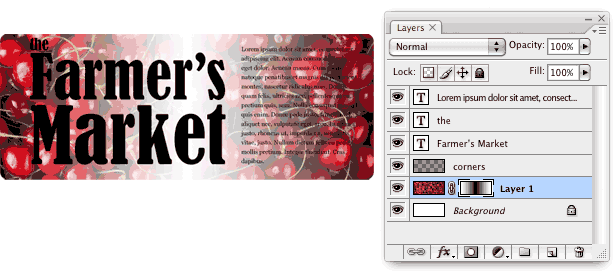
With a reflected gradient, the mask hides the center of the photo. In layer mask terms, light means more visible and dark means less visible.
We make the gradient “shallow” using Curves. If white areas of a mask are visible and black areas are invisible, then the gray is somewhat hidden.
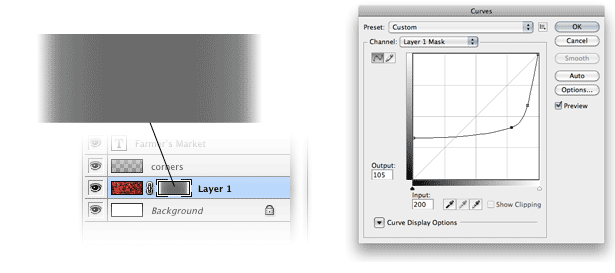
The result (above) is a photo that is screened behind text but still visible at the edges. However, the text is still difficult to read.
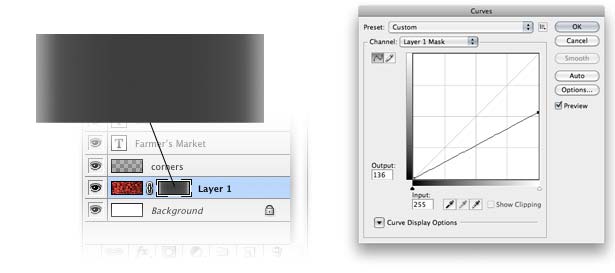
Every time Curves opens, it looks at the mask anew. Above, we lower the white point to make the mask darker and thus less visible.
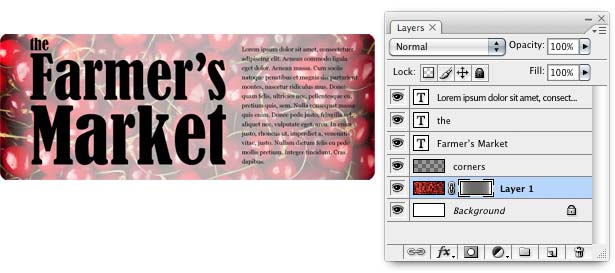
The result is a gently screened photo that fades into the text (above).
Secrets of the Curves Control
Curves is full of shortcuts and hidden features. Here are a few useful tidbits:
Still, the fundamentals haven’t changed since Photoshop 1.0 first arrived on the scene. Many possibilities arise from this simple control.
Written exclusively for Webdesigner Depot by Ben Gremillion. Ben is a freelance writer and designer who solves communication problems with better design.
Do you use Photoshop's curves in you designs? What for and how they impact your design?
WDD Staff


Read Next

15 Best New Fonts, July 2024

20 Best New Websites, July 2024

Top 7 WordPress Plugins for 2024: Enhance Your Site's Performance

Exciting New Tools for Designers, July 2024

3 Essential Design Trends, July 2024

15 Best New Fonts, June 2024

20 Best New Websites, June 2024

Exciting New Tools for Designers, June 2024

3 Essential Design Trends, June 2024

15 Best New Fonts, May 2024

How to Reduce The Carbon Footprint of Your Website
