

Step 1: Duplicate Your Project Management Template
This first step assumes that you have a web design project template. If you haven’t created one yet, I’d strongly encourage you to do so. Each project you take on will have the same basic structure, so why not spare yourself the trouble of having to recreate it every time? Regardless of which project management software you use, duplicating your template is easy. In Trello, you’ll click “Show Menu”: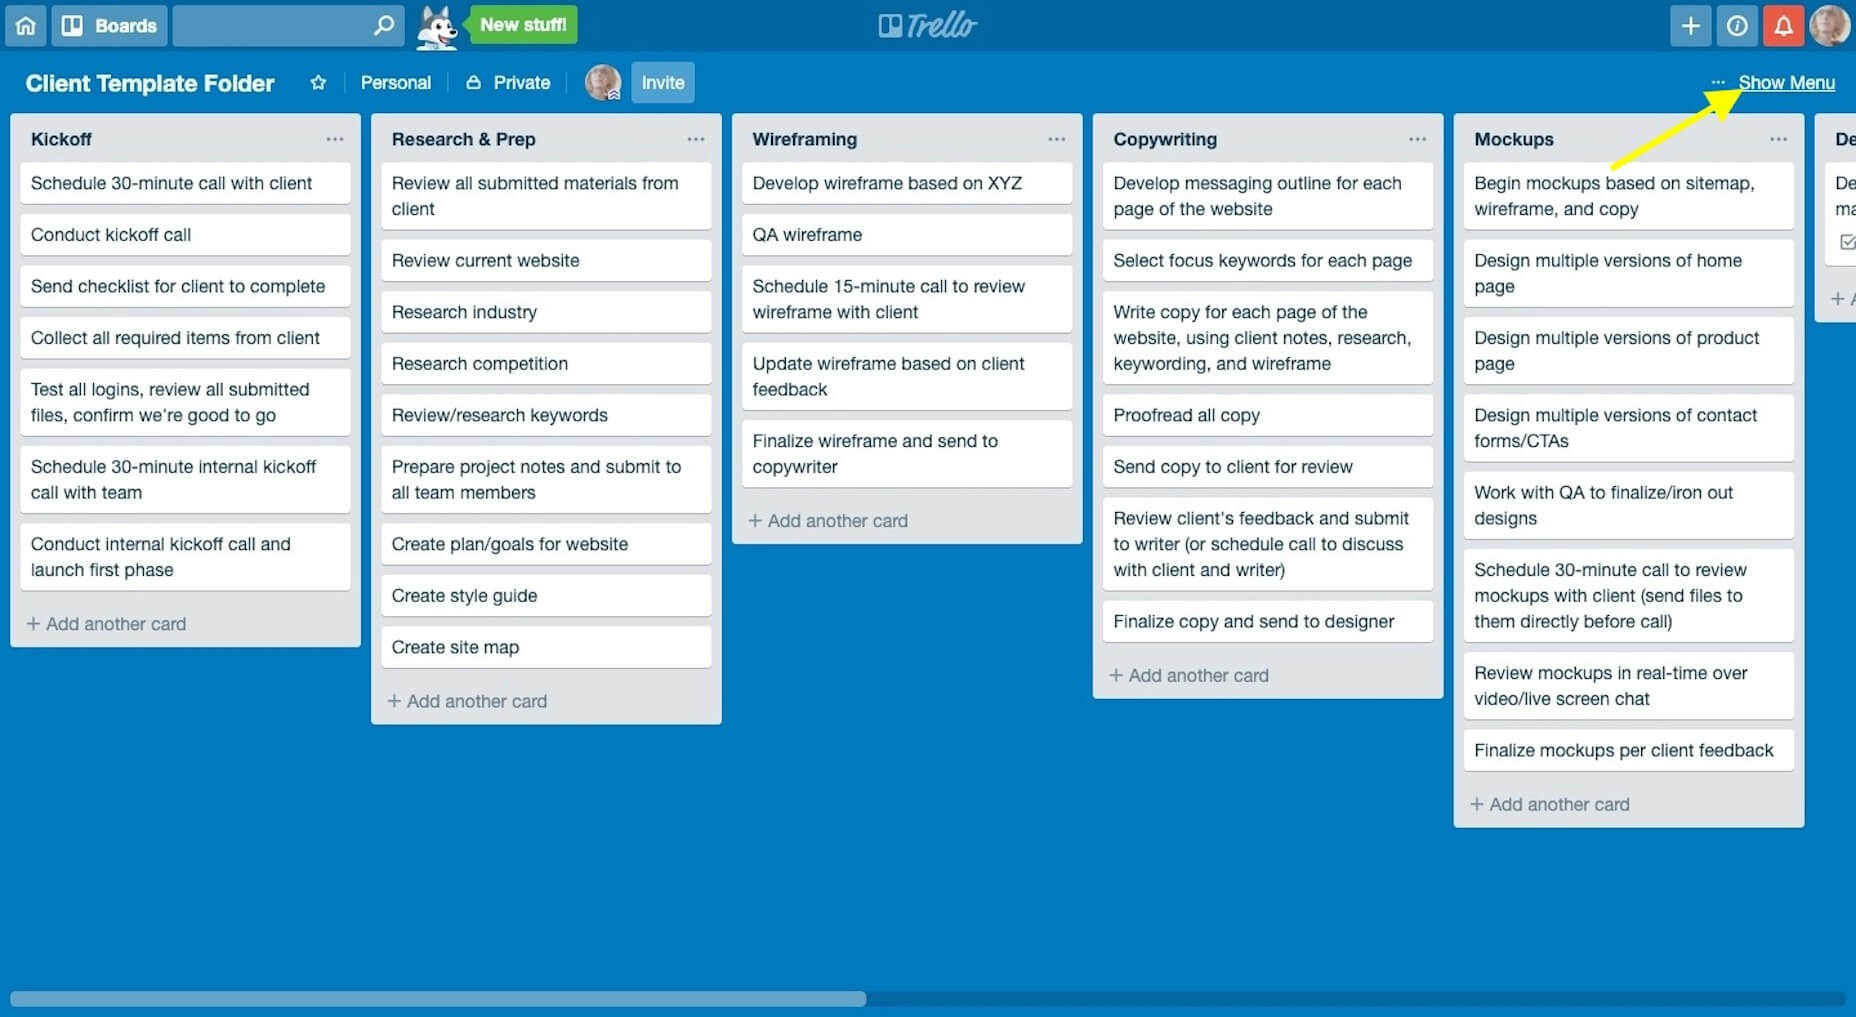 Then, “Copy Board”:
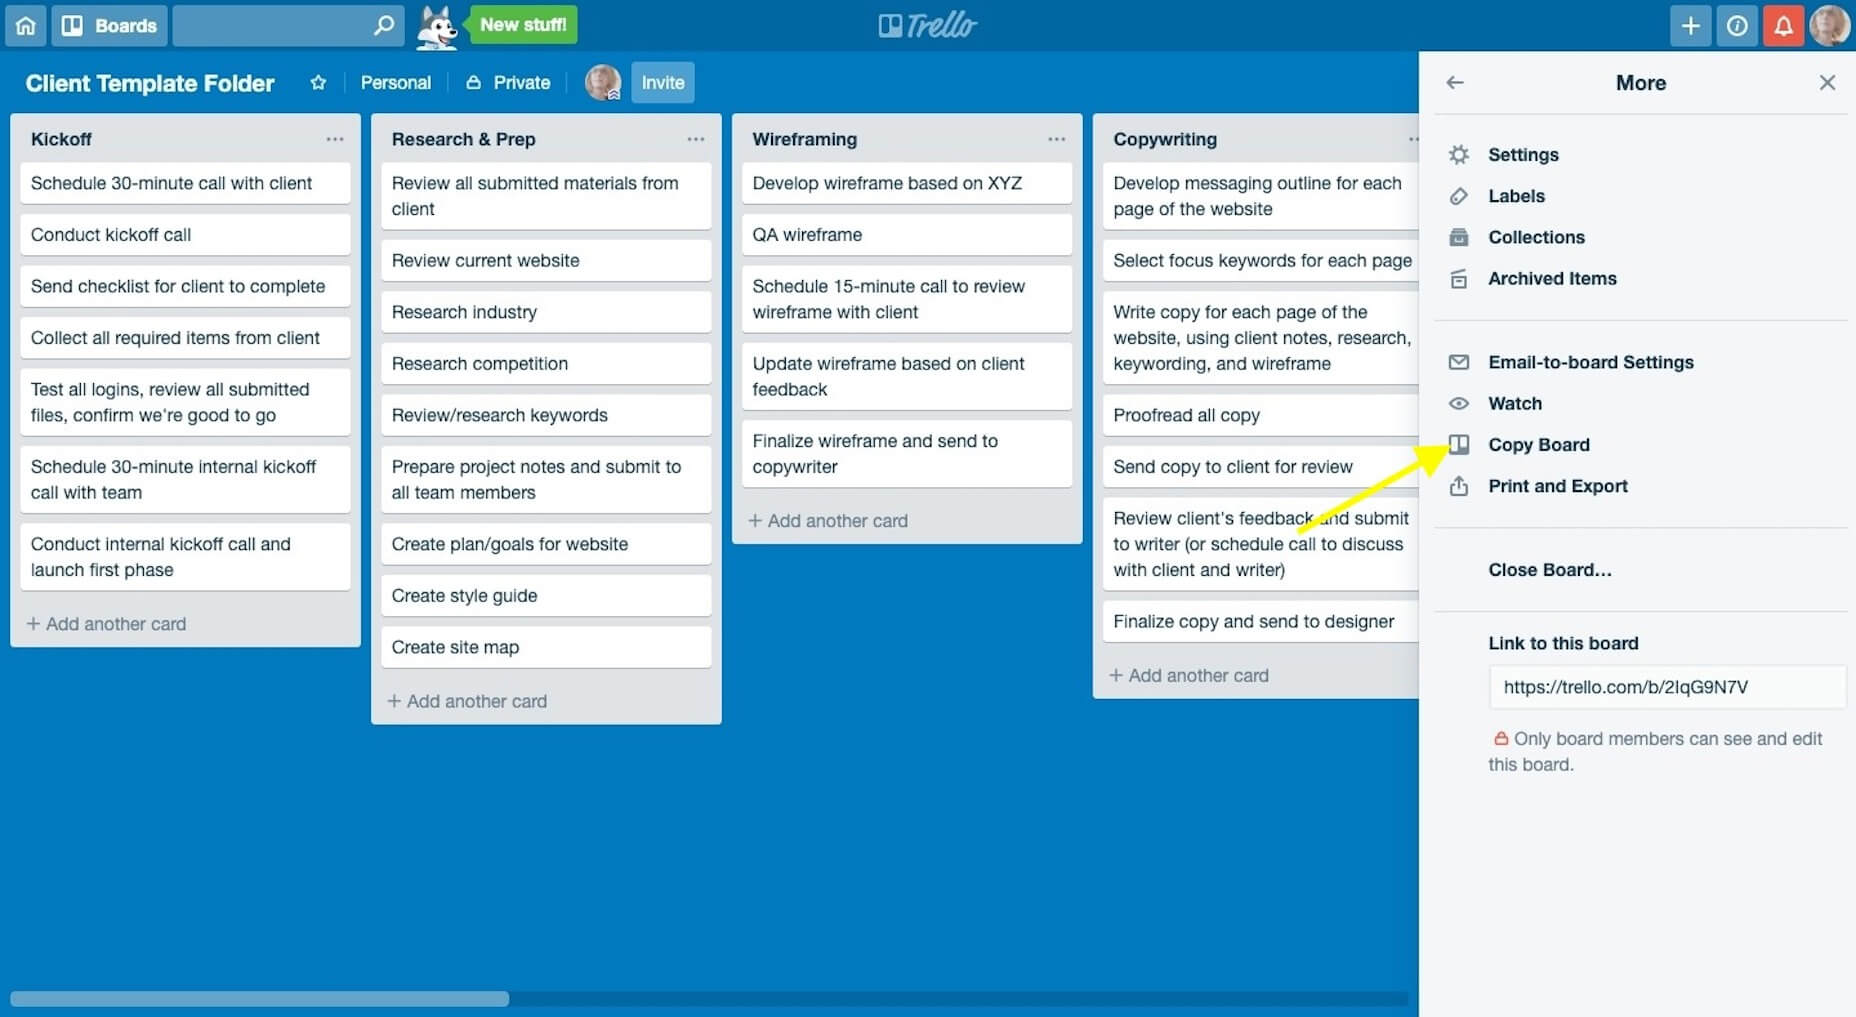 Name it with the new client’s name and click “Create”.
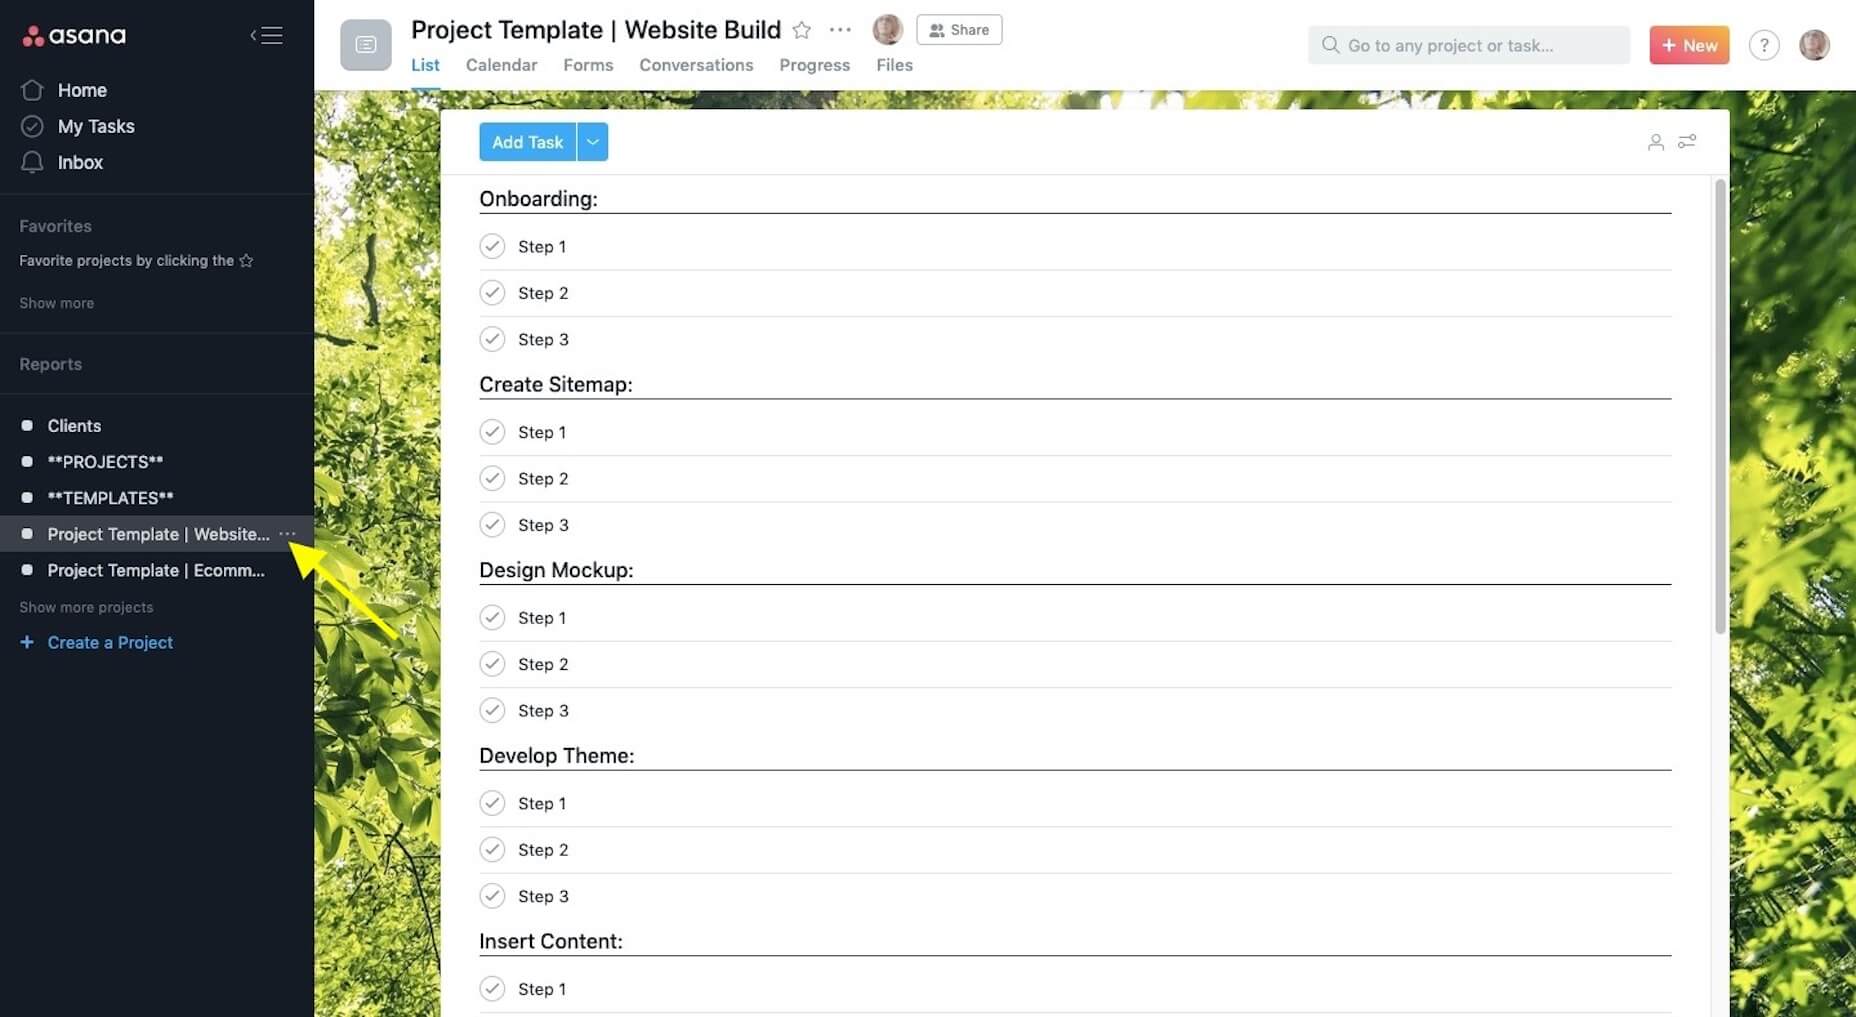
Or, in Asana, you’ll click on the “More” (three dots) icon:
Name it with the new client’s name and click “Create”.
Or, in Asana, you’ll click on the “More” (three dots) icon:
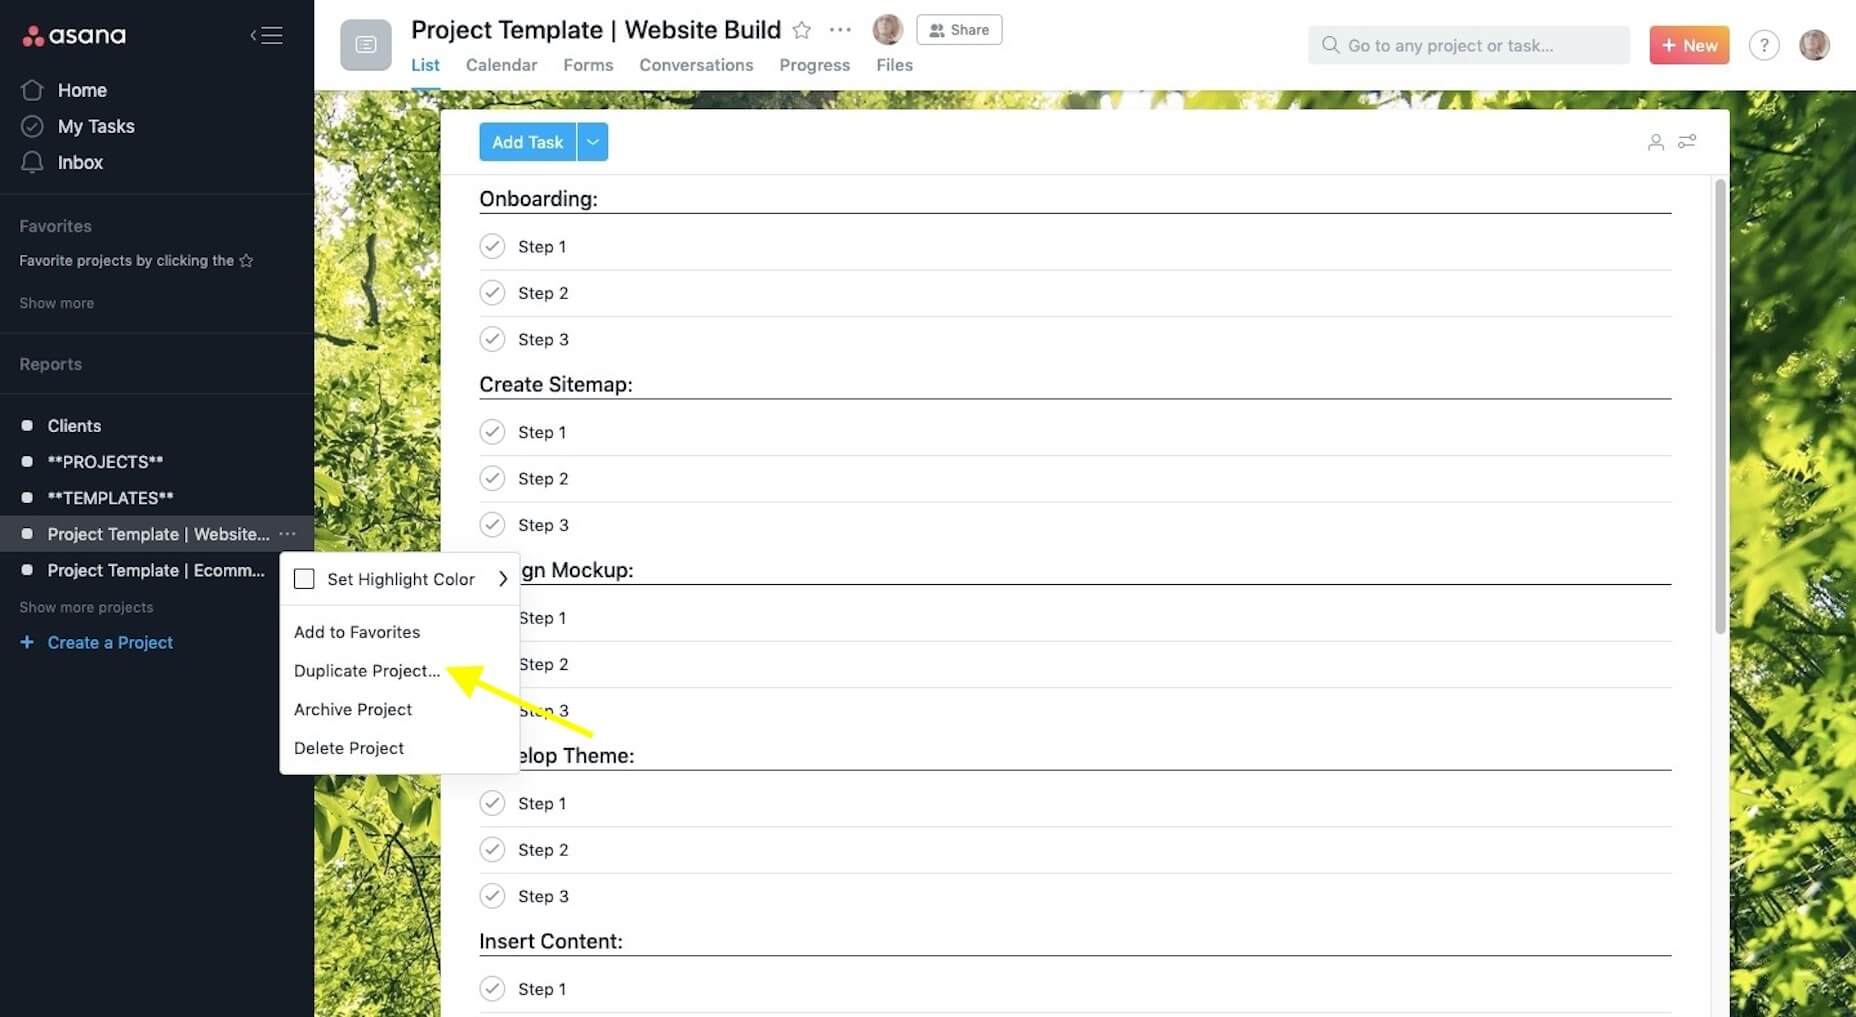
 Then, “Duplicate Project”:
 Name it with the new client’s name and then click “Create New Project”.
Add any team members that will be working on the job to the folder now.
Name it with the new client’s name and then click “Create New Project”.
Add any team members that will be working on the job to the folder now.
Step 2: Save Project Documents to the Folder
Centralize all of your documents, communications, and deliverables in the new project management folder. Start with the scope-of-work (SOW), proposal, and any notes you gathered on the client prior to the signing of the contract.Step 3: Schedule a Kickoff Call with the Key Stakeholder
If you haven’t already done so, identify who the key stakeholder is on the client’s side. Ideally, this is one person. Is it the CEO? The marketing admin? A project manager? Whoever you will be dealing with throughout the project (i.e. the decision-maker) should be the one to attend the kickoff call. This will streamline all communications during the project to ensure you’re not having to field requests or feedback from multiple parties.Step 4: Reinforce Expectations During the Kickoff Call
Over the course of 30 minutes, it’s your job to briefly communicate what the client can expect from you over the course of the job while reinforcing what you need from them to make it happen. This means talking about things like:- Your process;
- Project timeline;
- The feedback process;
- Milestones and progress calls;
- An introduction of your project management software (if you can do it through a live screen-share, that would be best).
Step 5: Send the Welcome Questionnaire
In the Welcome questionnaire you send after kickoff, explain to the client that they don’t have to worry about a thing in terms of building a beautiful website for their business. That’s your job. However, you do need certain things from them in order to do the job well. Although I don’t build websites for clients anymore, I still use the same onboarding process for my copywriting clients. Here is the Welcome email I send to them (feel free to tailor this to your own needs): Welcome aboard, [client name]!I'm very excited to get started and hope you are, too!
I know what a pain it is to create content for your own brand, so I'm happy you've entrusted it to me.
As we get moving here, I'm going to ask you for just a few things: [link].
Please fill this out within the next seven days. If I have any questions, I'll be in touch as soon as I can. It’s succinct and let’s the client know I’m not asking for much. I then send them a Google Forms questionnaire to collect all the remaining details, documents, and logins I need from them:
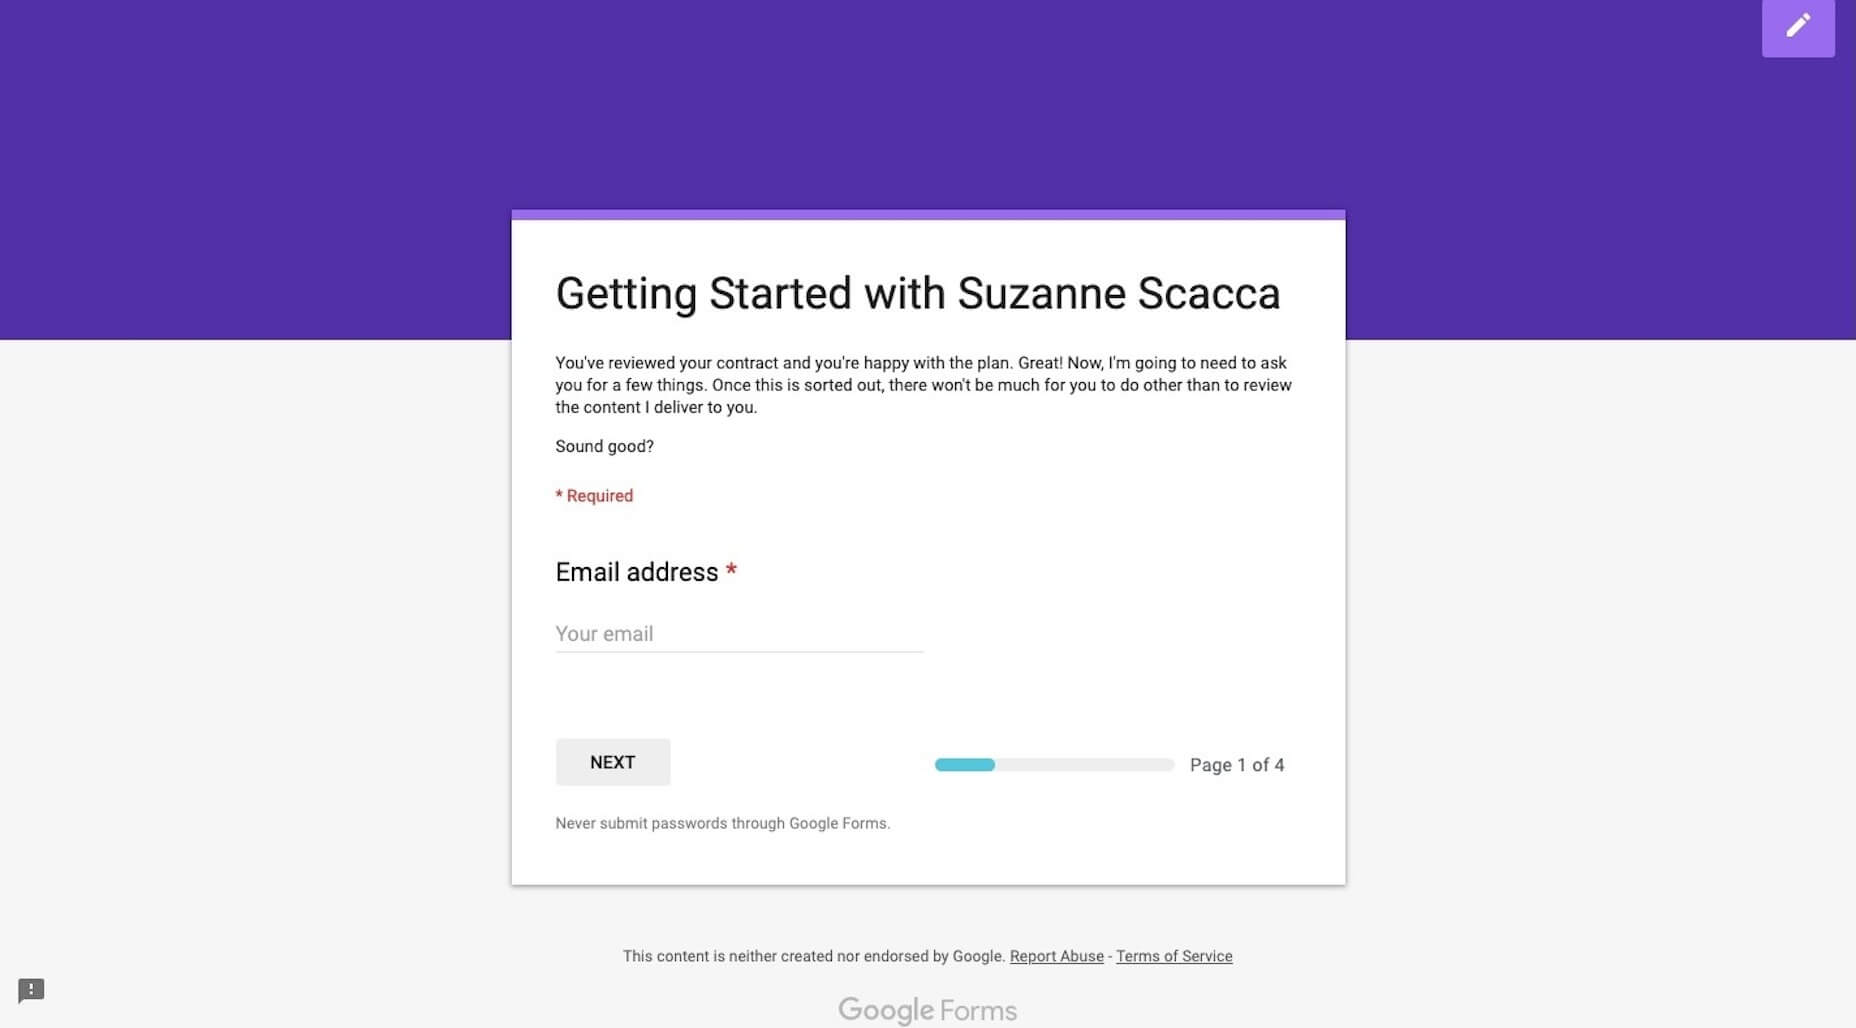 Personally, I love Google Forms for onboarding copywriting clients, but you may want to use something like Content Snare if you expect to receive lots of design assets and content.
In terms of what you ask for? It depends on how much you’re doing for the website, but I’d suggest starting with these:
Personally, I love Google Forms for onboarding copywriting clients, but you may want to use something like Content Snare if you expect to receive lots of design assets and content.
In terms of what you ask for? It depends on how much you’re doing for the website, but I’d suggest starting with these:
- Logins to their content management system and control panel (plus, logins to third-party integrations if you need them)
- Logo
- Brand guidelines
- 3-5 websites they like the look of
- Top 3 competitors’ websites
- Images, videos, and other brand assets
- Website pages (navigation)
- Content (if they’re writing it)
Step 6: Generate the Creative Brief
Based on everything you know about the client, their target audience, and goals for the website, you now need to generate the creative brief. This is a succinct document that lays out the details and plan for the website. It ensures that all parties — you, your team (if you have others working for you), and the client — are on the same page and in agreement of what’s to be done. That way, if questions or disagreements come up later, the creative brief will put any doubts to rest. You should include the following:- Title (i.e. website name)
- Project summary
- Start date
- Projected end date
- Deliverables
- Problems to be solved
- Goals/objectives
- Target audience
- Project milestones and due dates
Step 7: Schedule Progress Calls
One last thing to do is to schedule progress calls with the client. It might seem too early to do this, but it’s not really. You have a project start and end date. You have projected milestones. By scheduling progress calls for each milestone now, you can put the website on everyone’s radar, which will keep everyone involved (including the client) accountable to the project. Once your client has accepted the invitations, it’s time to start assigning tasks in your project management software and get to work!The Benefits of Onboarding
Think about all those times a client failed to deliver something that was owed to you (like logins, logos, or content) — and how that set your project timeline back. Think about all those times a client said, “I hate it” or asked for a fifth or sixth round of revisions despite clearly not knowing what they really wanted. Think about all those times you missed a step and had to backtrack once you were hip-deep in the design process. Onboarding web design clients helps you avoid common issues and strengthen your workflow by:- Documenting and storing everything in a centralized spot;
- Setting and reinforcing client expectations;
- Preventing scope creep;
- Designing websites with better outcomes;
- Boosting trust in your business.
And if you want to ensure the end of your project goes as as smoothly as the start, check out our 5 Tips for Successfully Offboarding Web Design Projects.
Featured image via Unsplash
Suzanne Scacca
Suzanne Scacca is a freelance writer by day, specializing in web design, marketing, and technology topics. By night, she writes about, well, pretty much the same thing, only those stories are set under strange and sometimes horrific circumstances.


Read Next

15 Best New Fonts, July 2024
Welcome to our monthly roundup of the best fonts we’ve found online in the last four weeks. This month, there are fewer…
By Ben Moss

20 Best New Websites, July 2024
Welcome to July’s round up of websites to inspire you. This month’s collection ranges from the most stripped-back…

Top 7 WordPress Plugins for 2024: Enhance Your Site's Performance
WordPress is a hands-down favorite of website designers and developers. Renowned for its flexibility and ease of use,…
By WDD Staff

Exciting New Tools for Designers, July 2024
Welcome to this July’s collection of tools, gathered from around the web over the past month. We hope you’ll find…

3 Essential Design Trends, July 2024
Add some summer sizzle to your design projects with trendy website elements. Learn what's trending and how to use these…

15 Best New Fonts, June 2024
Welcome to our roundup of the best new fonts we’ve found online in the last month. This month, there are notably fewer…
By Ben Moss

20 Best New Websites, June 2024
Arranging content in an easily accessible way is the backbone of any user-friendly website. A good website will present…

Exciting New Tools for Designers, June 2024
In this month’s roundup of the best tools for web designers and developers, we’ll explore a range of new and noteworthy…

3 Essential Design Trends, June 2024
Summer is off to a fun start with some highly dramatic website design trends showing up in projects. Let's dive in!

15 Best New Fonts, May 2024
In this month’s edition, there are lots of historically-inspired typefaces, more of the growing trend for French…
By Ben Moss

How to Reduce The Carbon Footprint of Your Website
On average, a web page produces 4.61 grams of CO2 for every page view; for whole sites, that amounts to hundreds of KG…
By Simon Sterne

20 Best New Websites, May 2024
Welcome to May’s compilation of the best sites on the web. This month we’re focused on color for younger humans,…